
Improve load times for delayed users by using Cache Control, ETags and versioned assets, combined with Service Workers for enhanced offline usability.
The Coffee Shop Analogy
Picture this: you walk into a cozy coffee shop. The barista must find the beans, grind them, and brew the coffee. The first cup takes a little while. The next day you stride in, order the same drink, and—boom!—the barista smiles and slides the cup across the counter. Your order is ready in seconds. How? The beans are already ground, the steam wand is hot, and the recipe is fresh in the barista’s mind. In short, that tiny boost in speed comes from memory.
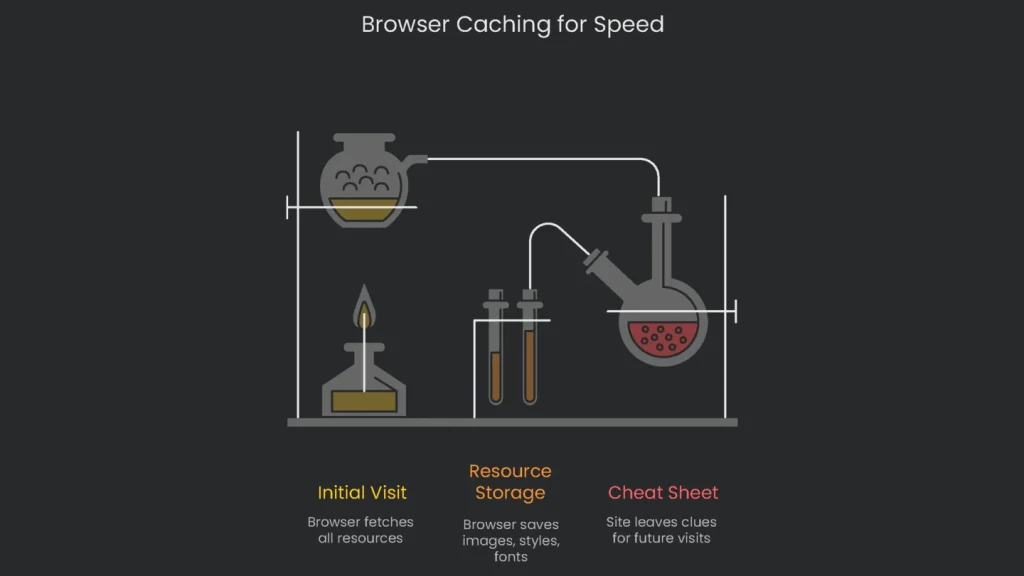
Browser caching is a smarter version of the same idea. Only this time the “memory” is in your laptop, tablet, or phone. To speed things up for returning visitors, the site leaves cheat-sheet clues—images, styles, and even fonts—so the browser does not fetch them again from the internet. As a result, when the visitor comes back, the browser “grabs the coffee-image already hanging on the wall” and the “frosting already nice and really frosted,” and the page loads in a flash. It’s almost like a trusty library keeping your favorite bookmarks at the front of the stack or a toolbox keeping frequently used screwdrivers near your workbench. Therefore, saving a little memory at the right time takes the wait out of “I already visited this.”
What Is Browser Caching?
Think of browser caching as your web browser—whether it’s Chrome, Firefox, or Safari—acting like a super-memory assistant. On a first visit, it downloads files that probably won’t change soon: your logo, images, web fonts, the CSS files that control the look, and the JavaScript files that add interactive bits. These files go into a special spot on the computer called the “cache.” If you want to dive deeper into setup, we’ve got best practices you can follow.
On a second visit, the browser doesn’t bug your web server right away. Instead, it checks the cache on that same device. If it finds a recent version of your logo, it grabs it locally rather than flying across the internet again. Consequently, you save download time and reduce the data that must zoom through the wires. The returning visitor gets a site that’s ready in a second. That’s how caching turns slow loading into a super-fast experience while keeping incoming data to a minimum.
Why Faster Repeat Visits Matter
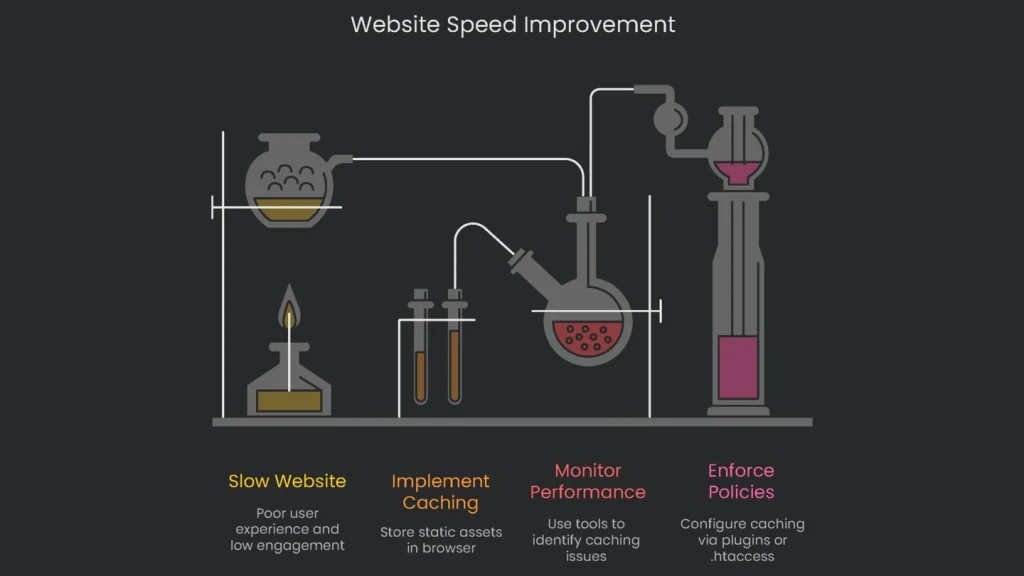
Caching might sound like a techy buzzword, yet its real-world impact is clear. Today’s web visitors want everything in a snap. If a site hesitates, visitors click away, purchases drop, and brand trust wobbles. Therefore, check the numbers—proof of how brutal a lag feels and the price it demands:
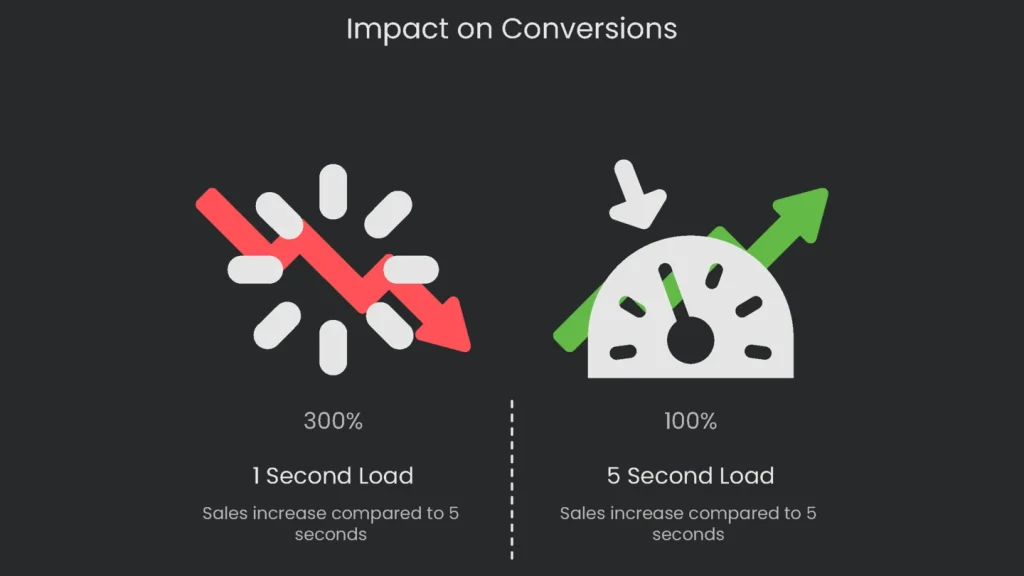
- Impact on Conversions: A one-second load boosts conversion pace: 3× the sales of a site that takes 5 seconds, and 5× the count at 10 seconds. A sneaky 0.1-second speed lift can raise conversions on retail sites by 8.4% and on travel sites by 10.1%. Conversely, one slow second can shave 7% off sales.
- Skyrocketing Bounce Rates: The chance of a visitor bouncing rises 32% if load time crawls from one to three seconds. At five seconds, the spike is dramatic; at ten, the exodus hits 123%. Mobile users are just as strict: 53% leave if a page takes longer than three seconds.
- Sinking User Happiness: When a site lags, so does visitor mood. If the loading bar lingers for a single second, our mood can drop by 16%. Worse, 79% of people vow never to shop on a sluggish site again. In short, that frustration sticks around.
This data isn’t just an IT checklist item; it’s the scoreboard. A slick, fast page isn’t an extra; it’s a coach saying, “Stick around; we like you!” Sure, a speedy first impression matters. However, the repeat visit is where the real reward lives. If the second visit chugs, it wastes a hard-won vote of confidence. As a result, a smart caching plan acts like a backstage pass: visitors walk in, their page is waiting, their favorites are already loaded, and—boom—brand trust levels up.
The Magic of Caching
Let’s dig into the “magic trick” sites use to defeat loading lag. Understanding caching is easiest when you contrast a first-time visitor with someone who comes back.
On your first trip to a page, the browser feels like a tourist. It does not know where to go, so it collects everything from the main HTML file to the CSS, JavaScript, and all the images. Each piece means another stop and another request to the server. The total can climb into dozens or even hundreds. Therefore, this is the long, slow journey where every file is a stranger.
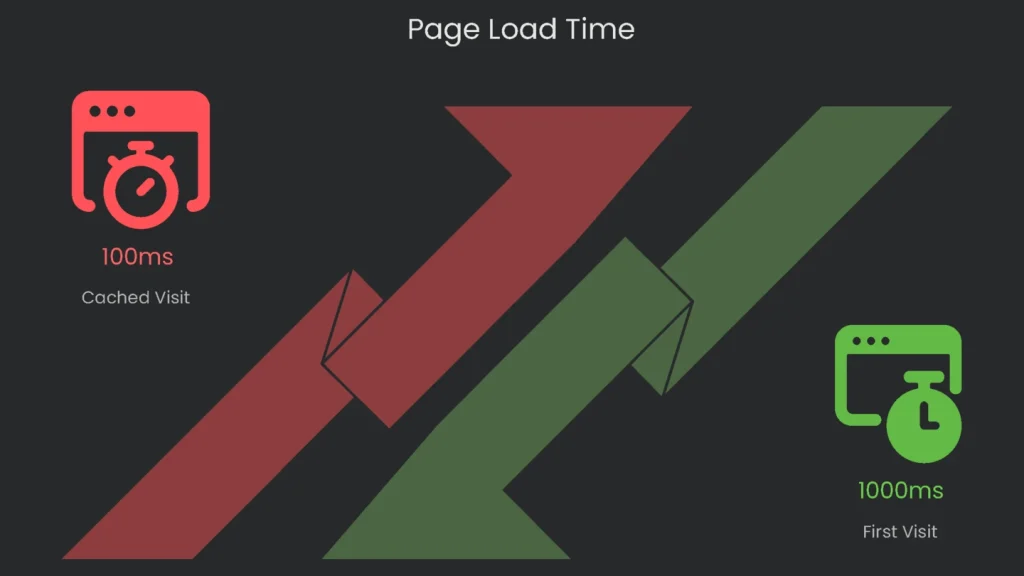
However, when you come back and caching is enabled, the trip turns speedy. Before it even whispers to the network about a file like logo.png, the browser checks its memory for a fresh copy. If it finds one, that file zips into place without bothering the server. Only brand-new or changed items get pulled from the web. Consequently, the page loads almost instantly.
How the Browser Learns to Cache
This clever journey is guided by a behind-the-scenes language called HTTP Headers. These are silent instructions your web server tacks onto every downloaded file. Each header is a tiny traffic sign telling the browser when to keep a file, when to throw it away, and how long to trust what it has stored. Think of HTTP headers as care labels stitched inside warm sweatshirts: “Cold wash, no tumble-dry.” Likewise, a logo might arrive with “Keep me for a whole year.” A shopping cart page might say, “No peeking. Always ask the shop for the latest.”
Cache-Control & Expires
Two popular notes tell the world how long to hang on to a resource: Cache-Control and Expires. Let’s break that down.
- Expires: The vintage note. It says, “Put me in the attic on this date and hour.” For example, “
Expires: Wed, 21 Oct 2026 07:28:00 GMT.” The catch? It relies on the visitor’s device clock. If that clock is wrong, the plan gets muddled. - Cache-Control: The turbo-boost version of the older Expires header. Instead of a fixed date, it starts a clock the moment the file loads. The most common clock is
max-age, which says, “cache this file for X seconds.” For instance,Cache-Control: max-age=3600means “keep this for one hour, then recheck.” Since it begins when the visitor sees the file, it’s safer. Today’s browsers prefer the Cache-Control header and ignore Expires if they find amax-age. To be tidy on the server side, many send both.
Cache-Control is like a spice rack for caching. A single header can mix several directives to create the perfect recipe.
| Directive | What It Means | Common Use Case |
public, max-age=31536000 | “Anyone, including caches like browsers and CDN, can store this file for a year.” | Your logo, brand fonts, and core CSS/JS files that rarely change. |
private, max-age=3600 | “Only the user’s own browser can store this file for one hour. No shared or public caches.” | A personal account page or user info. |
no-cache | Means, “You can keep this file, but double-check with the server before using it again.” | The HTML of a news homepage, where stories can change every minute. |
no-store | Means, “Do not keep this file anywhere. Fetch a new version every time.” | A payment confirmation page or any document with sensitive details. |
Expiration isn’t the only way to handle caching. When a browser suspects its saved version might be old, it asks, “Did the file really change on the server?” That’s where ETag and Last-Modified come in. These headers save bandwidth by letting the browser check for new versions without downloading the entire file again.
- Last-Modified: The Last-Modified header tells the browser the exact date and time the page was updated. When the cache runs out, the browser includes this date in a request. If the file hasn’t changed, the server replies with a tiny empty message and a status of
304 Not Modified, so the browser keeps its original copy. - ETag (Entity Tag): Think of this as a fingerprint for a file version. It’s a short code the server assigns to the exact file version—something like “v2.1.3-a8c4.” Whenever the file is tweaked, this code changes. Consequently, it’s a reliable way to check for newer versions.
Checking Your Site’s Caching Performance
Using Google PageSpeed Insights
Before making changes, it’s smart to see how your site handles caching. The go-to tool is Google PageSpeed Insights. It’s free and gives straightforward tips to speed up any webpage.
The steps are quick:
- Head to the PageSpeed Insights site.
- Paste the URL of the page you want to check.
- Hit “Analyze” and let it do its thing.
Reading the Caching Warning
When the tool finishes, it serves a detailed report. Check the “Opportunities” section. If there’s a caching issue, the report will flag it. The warning may say your server is missing caching hints or that those hints don’t last long enough. This warning is your call to action. Next, dig into the report table:
- URL: Points to the exact file that isn’t cached correctly—often a CSS file, an image, or similar.
- Cache TTL (Time to Live): Shows how long the browser may keep the file. If it reads “None,” the browser isn’t told to save anything.
- Transfer Size: Tells you how much data a user would save next time if the file were cached properly.
Sometimes you’ll see the PSI warning because of common mistakes:
- No Headers at All: The server isn’t sending Cache-Control or Expires lines, so the browser knows nothing about caching.
- Too Short a Caching Period: The headers exist, but
max-ageis set too low. Usually, Google suggests at least 30 days. For static files, up to a full year is better. - No-Cache Settings: A cacheable file is mistakenly marked with
no-cacheorno-store. Fortunately, that’s a simple fix once you spot it.
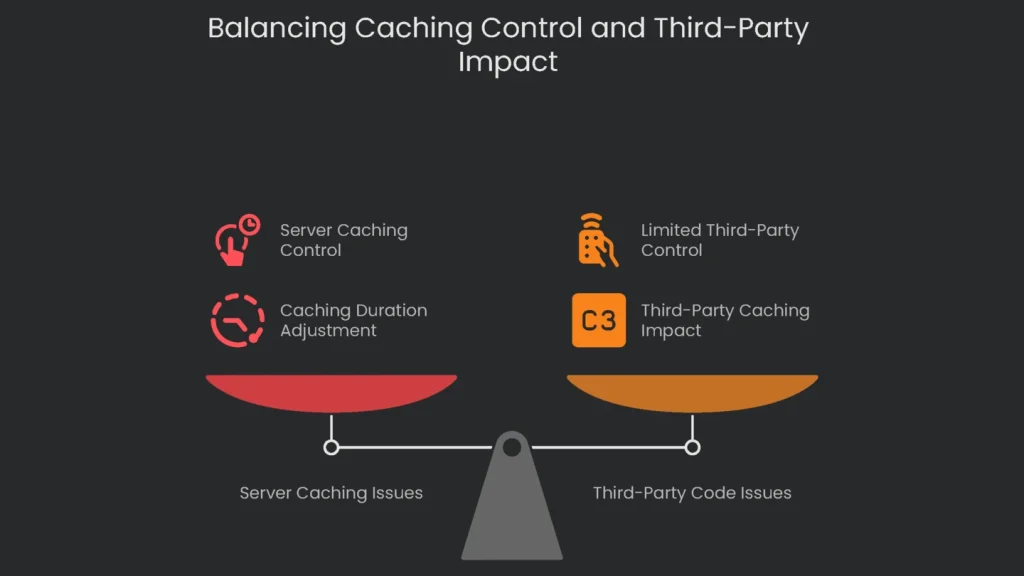
Third-Party Code: If the tool warns about third-party scripts, you’re likely seeing files from Google Analytics or a Facebook tracking pixel. Those run from someone else’s server, so you can’t change their caching rules. However, you can review the list and weigh the impact. For example, you might host a smaller alternative, defer a tag, or load it after the main content becomes visible.
How to Enable Caching
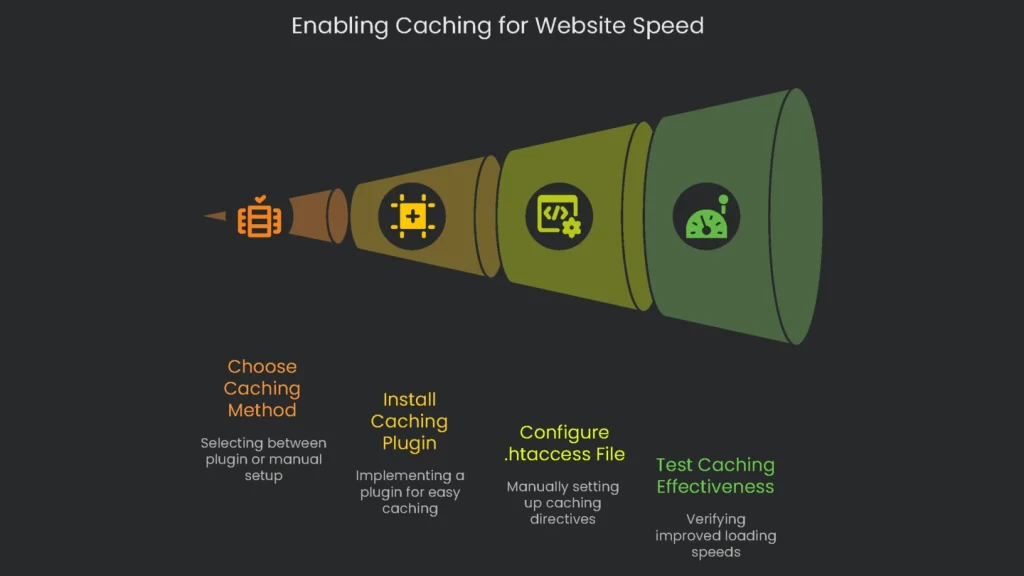
Now that you know what slows the page, the next job is to tell the browser how long to hold onto files. The exact steps depend on your platform and comfort level. Consequently, pick the route that fits your workflow.
The Easy Option for WordPress
If your site runs on WordPress and you want a safe, easy win, reach for a well-rated performance plugin. Usually, you answer one or two questions, click save, and the plugin handles the tricky bits behind the scenes.
Why Use a Caching Plugin?
Caching plugins boost speed without server jargon. When you install one, it quietly adds the optional code that tells your server to cache files. You wave goodbye to long loads without touching fragile config files. As a result, a few clicks squash the “Serve static assets with an efficient cache policy” issue in performance scans.
Top WordPress Caching Plugins
WordPress has some rock-solid options for cache champs.
- WP Rocket: The go-to premium favorite. It starts working the moment you hit “Activate.” It automatically applies smart caching rules, needs near-zero tinkering, and is a “set it and forget it” helper.
- W3 Total Cache: The heavyweight free option. Check the “Browser Cache” box to start caching files visitors want. It has deep settings, so novices may want to go slow.
- Other Choices: FlyingPress is a popular pick. If your site runs on a LiteSpeed server, choose the LiteSpeed Cache plugin. It’s fast because it uses server-level caching and turns on browser caching without hassles.
Here’s a side-by-side look at favorite caching plugins.
| Plugin | Ease of Use | Browser Caching Setup | Cost | Best For |
| WP Rocket | Very Easy | Automatic on activation | Premium | Beginners wanting everything in one plugin. |
| W3 Total Cache | Moderate | Manual toggle needed | Freemium | Anyone wanting in-depth settings and happy to tinker. |
| LiteSpeed Cache | Easy | Automatic when on LiteSpeed server | Free | LiteSpeed users, of course! |
Manual Setup for Developers
If you’re on an Apache server and comfortable with code, you can enable browser caching by tweaking the .htaccess file.
Working with the .htaccess File
The .htaccess file is a handy helper for Apache web servers. Think of it as a rulebook that tells the server what to do when someone visits your site. By adding simple directives, you can tell the server to remember certain files—like images and scripts—so the next visits load faster. You’ll usually find this file in your website’s root folder. If you want to dig deeper, there’s a guide out there to configure the .htaccess file properly.
Quick Code for Caching Setup
Want browsers to save files for a while? Drop this snippet into your .htaccess. It first checks that the server is ready (using mod_expires). Then it gives common file types a long “save this for later” ticket so they don’t need to be redownloaded right away.
Apache
# START Cache Your Visitors’ Favorite Stuff

<IfModule mod_expires.c>

  ExpiresActive On

  ExpiresDefault "access plus 1 month"

  # Images

  ExpiresByType image/jpeg "access plus 1 year"

  ExpiresByType image/png "access plus 1 year"

  ExpiresByType image/gif "access plus 1 year"

  ExpiresByType image/webp "access plus 1 year"

  ExpiresByType image/svg+xml "access plus 1 year"

  ExpiresByType image/x-icon "access plus 1 year"

  # Styles and Scripts

  ExpiresByType text/css "access plus 1 year"

  ExpiresByType text/javascript "access plus 1 year"

  ExpiresByType application/javascript "access plus 1 year"

  # Fonts

  ExpiresByType application/font-woff "access plus 1 year"

  ExpiresByType application/font-woff2 "access plus 1 year"

  ExpiresByType application/vnd.ms-fontobject "access plus 1 year"

  ExpiresByType font/opentype "access plus 1 year"

  ExpiresByType font/truetype "access plus 1 year"

</IfModule>

# END Cache Your Visitors’ Favorite Stuff
WARNING!
The text you’re about to edit is sensitive. Changing your .htaccess file is like swapping the GPS in your car. Mess it up and the site can hit a “500 Internal Server Error.” First, grab a copy of the original file. Use any FTP or file manager to download it to your desktop. Also, avoid “cloud-only” backups; servers can hiccup and you can lose them. If you’re not a command-line fan, consider a reputable plugin or ask a developer friend. Finally, click “Save” and test the site carefully.
Conclusion
Enabling browser caching is one of the quickest, oldest tricks for speeding up any website. It still works wonders. When repeat visitors return, you want everything to feel crisp and ready. By telling the browser what to keep and for how long, you give every user a lightning-fast welcome, raise satisfaction, and create a ripple effect that helps your site and your business thrive.
How to Set Up Solid Caching
Mastering browser caching boils down to these three straight arrows:
- Know: Think of caching as users dodging long lines. The browser, acting as a friend, saves copies of photos, scripts, and styles. Consequently, the next visit loads in a blink.
- Check: Use a free tool like Google PageSpeed Insights and read the report. The tip “Serve static assets with an efficient cache policy” will point to files still waiting to join the fast lane.
- Enforce: Pick what fits you. Most WordPress sites use a plugin like WP Rocket or W3 Total Cache for one-click setup. If you prefer precision, a quick tweak in
.htaccessgives you GPS-level control.
A Speedy Site’s Payoff
Turning on browser caching does more than bump a performance score. You improve how visitors feel about your site. When someone returns and a page opens instantly, it shows you respect their time. That polish builds trust and nudges action, whether they share a post or hit “add to cart.” In an online world where one click and one second can flip a win or a flop, speeding up that first-second click can help you earn more and grow faster.
Implementation steps
- Stamp static assets with Cache-Control and ETag headers that reward fetches with long stare-at-it times.
- Use hashed filenames for every deploy (like app.abc123.js) so browsers grab the new version right away.
- Offer short-lived HTML cache when every second counts; logged-in users see the freshest page.
- Cache at the edge with your CDN to shrink response times no matter where your users click.
- Use DevTools’ Network tab to test how pages feel on repeat visits and make sure response headers look right
Frequently Asked Questions
Why cache in browsers?
To speed up repeat visits and save bandwidth and server processing.
Which headers count the most?
Cache-Control, ETag, and Last-Modified.
How long do I keep assets?
Versioned files—months; HTML—short or no cache.
How do I expire the cache the right way?
Attach a hash to the file name (like style.abc123.css).
Do CDNs take the place of browser cache?
No, CDNs work alongside it for the fastest results.